Purpose
Applications in Planum represent groups of containers deployed to a site. When you deploy an application, it’s automatically distributed across the servers in the selected site, sharing the workload and providing built-in load balancing. Applications may be comprised of many containers, for instance, a frontend interface, middle tier, and database. These components may be deployed from a container registry or from a Git repo.Deploying Applications
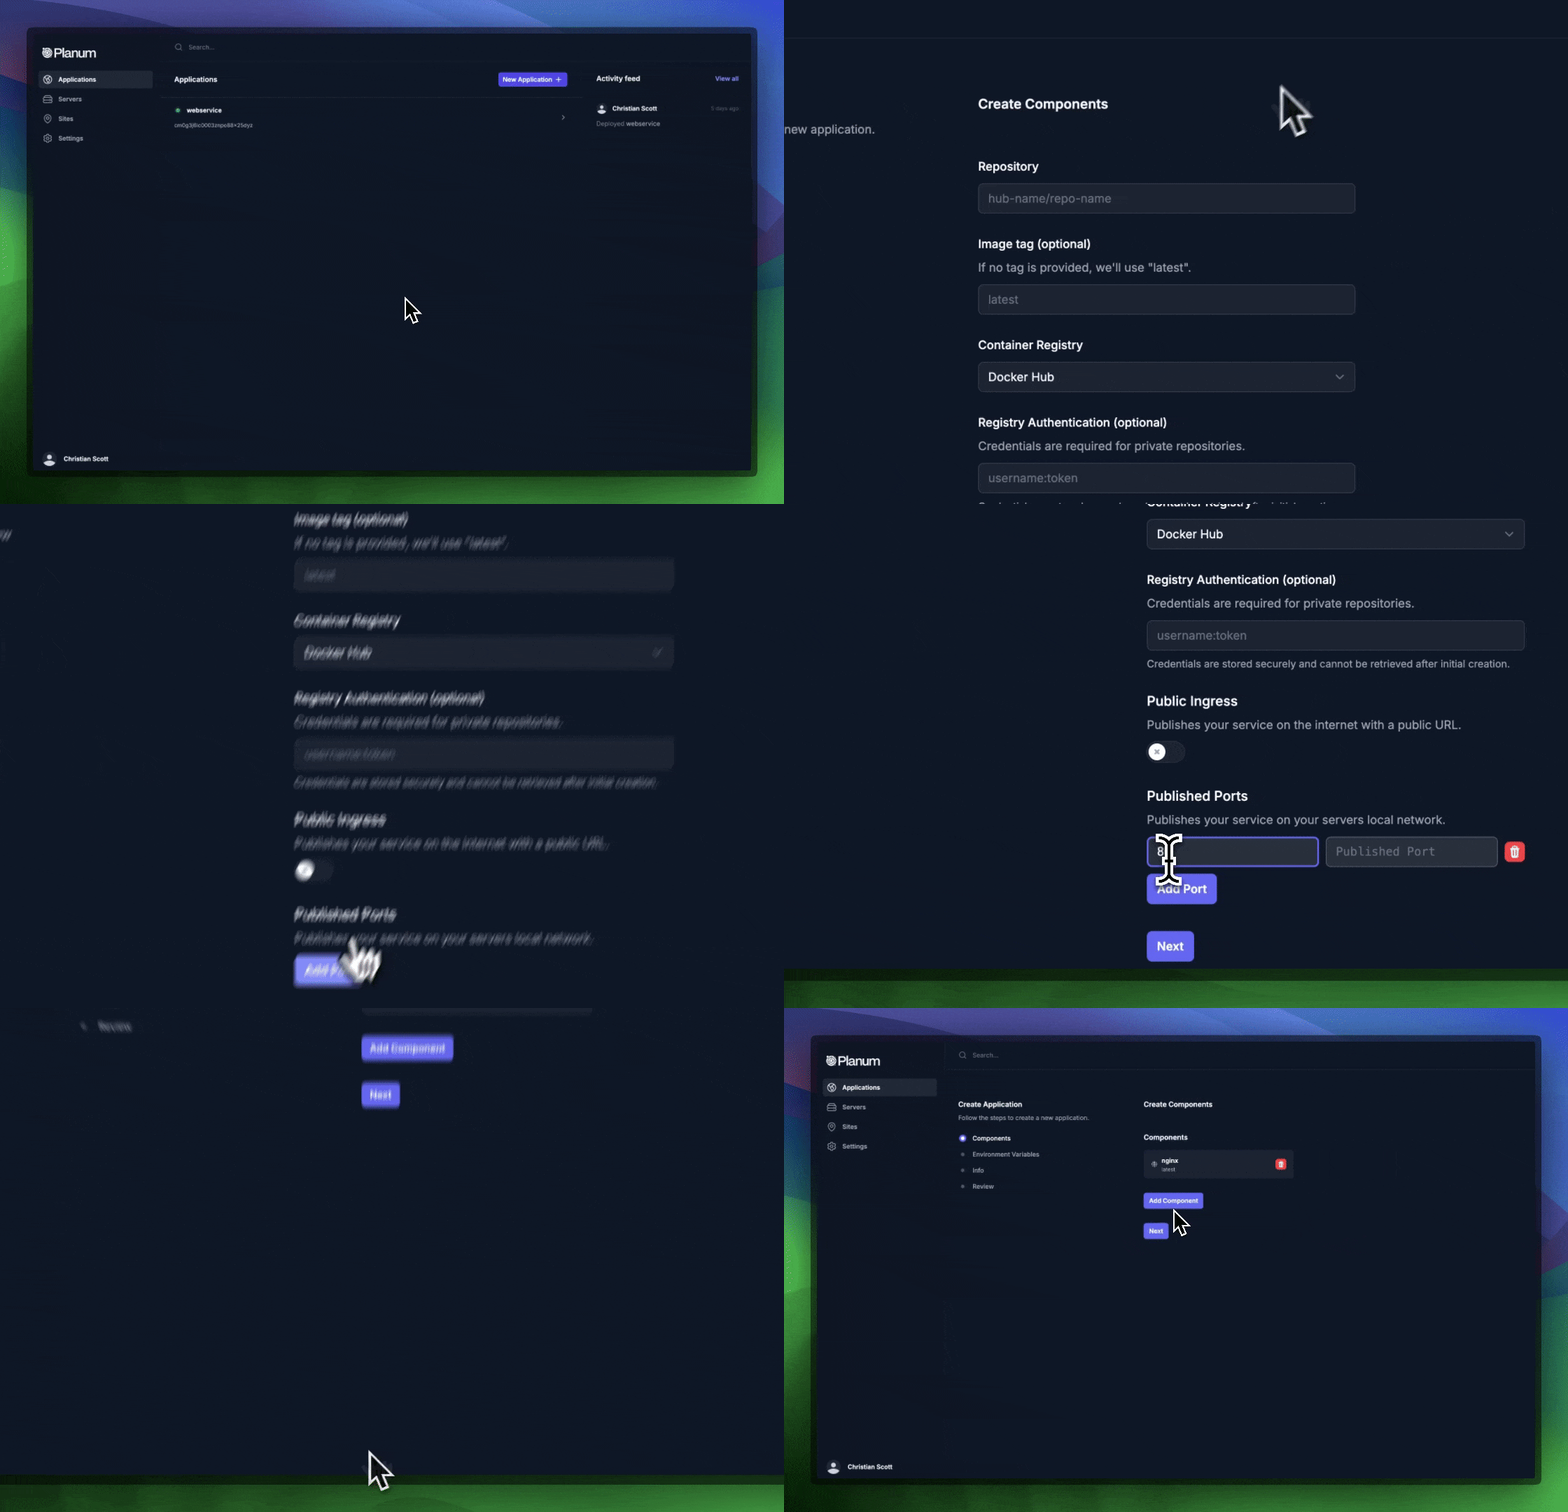
Deploying an application in Planum involves a few simple steps:- Create components
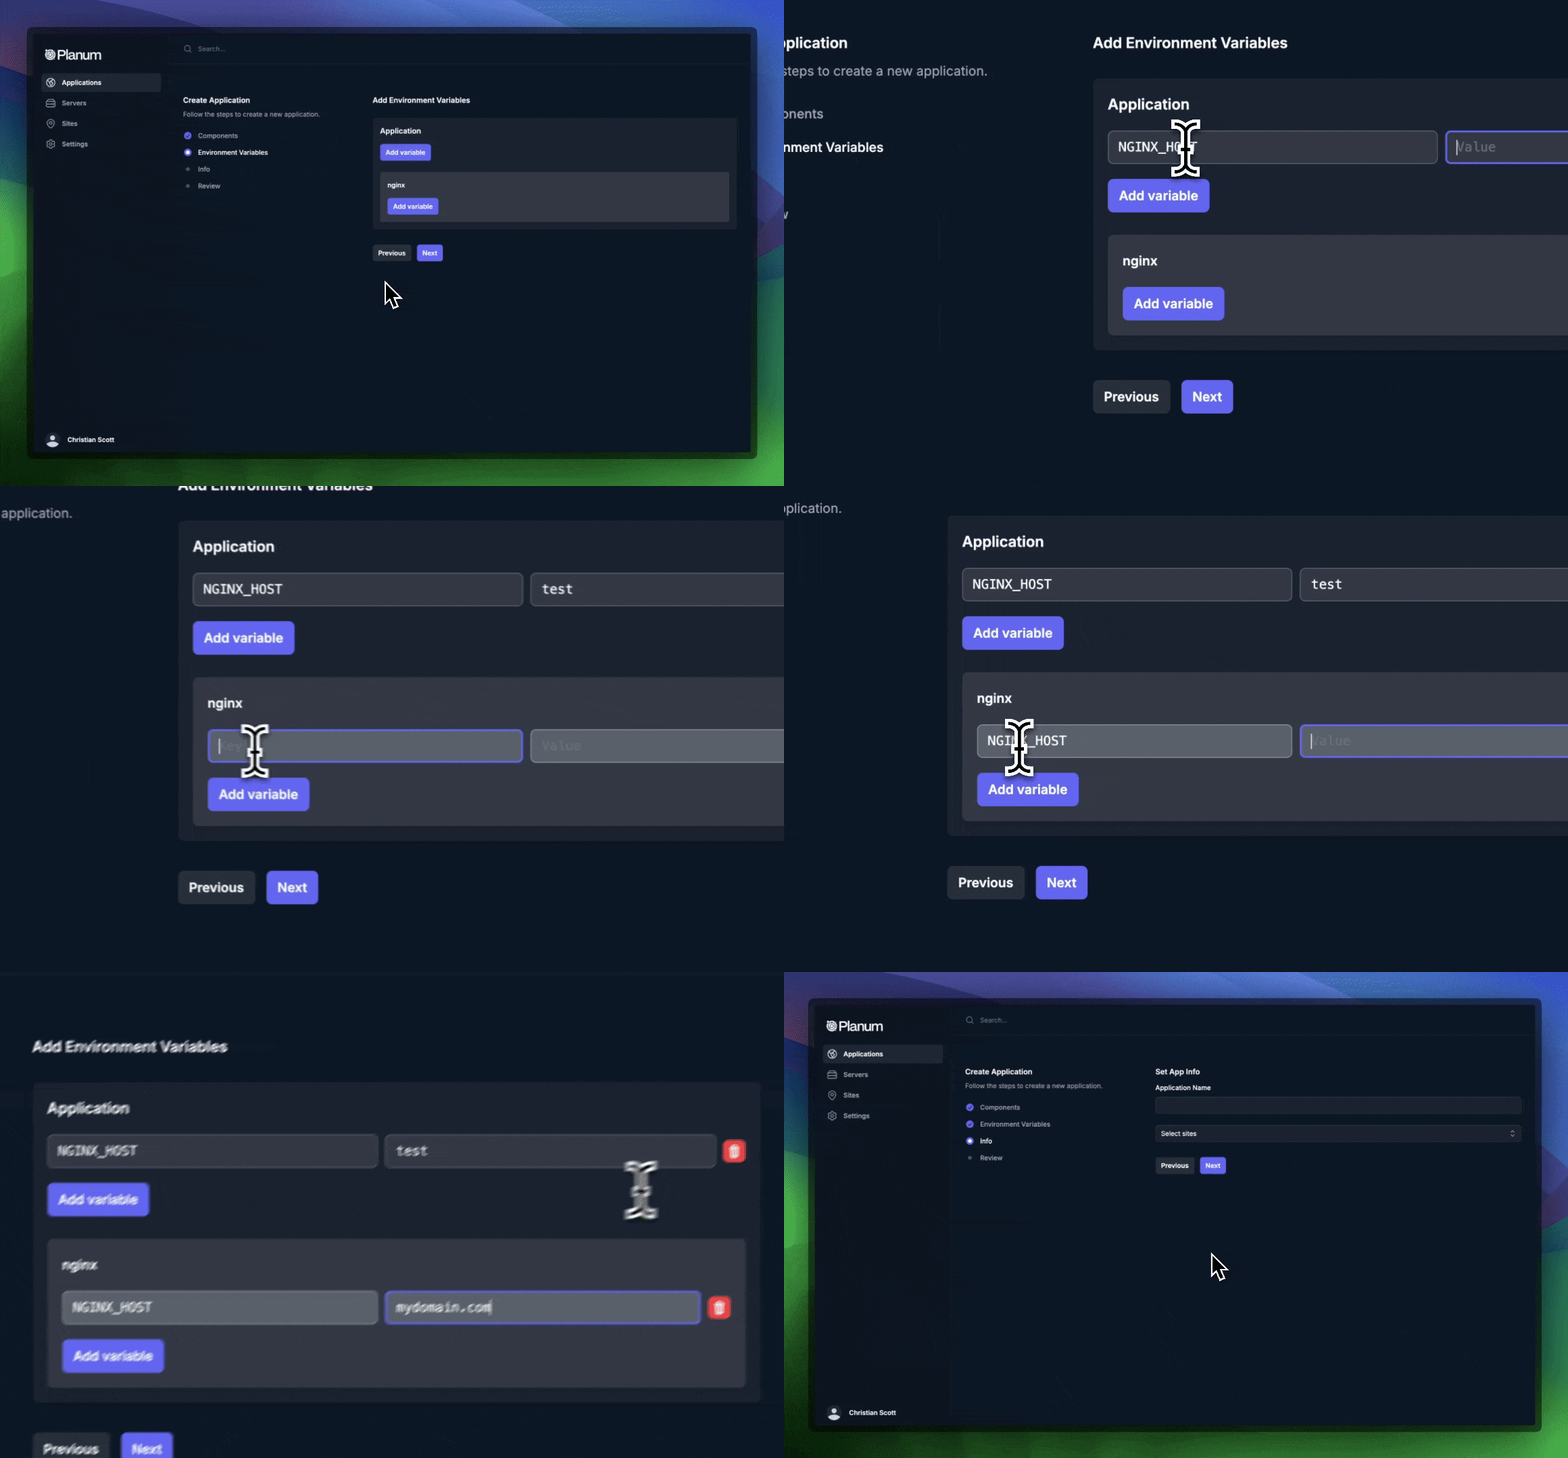
- Set environment variables
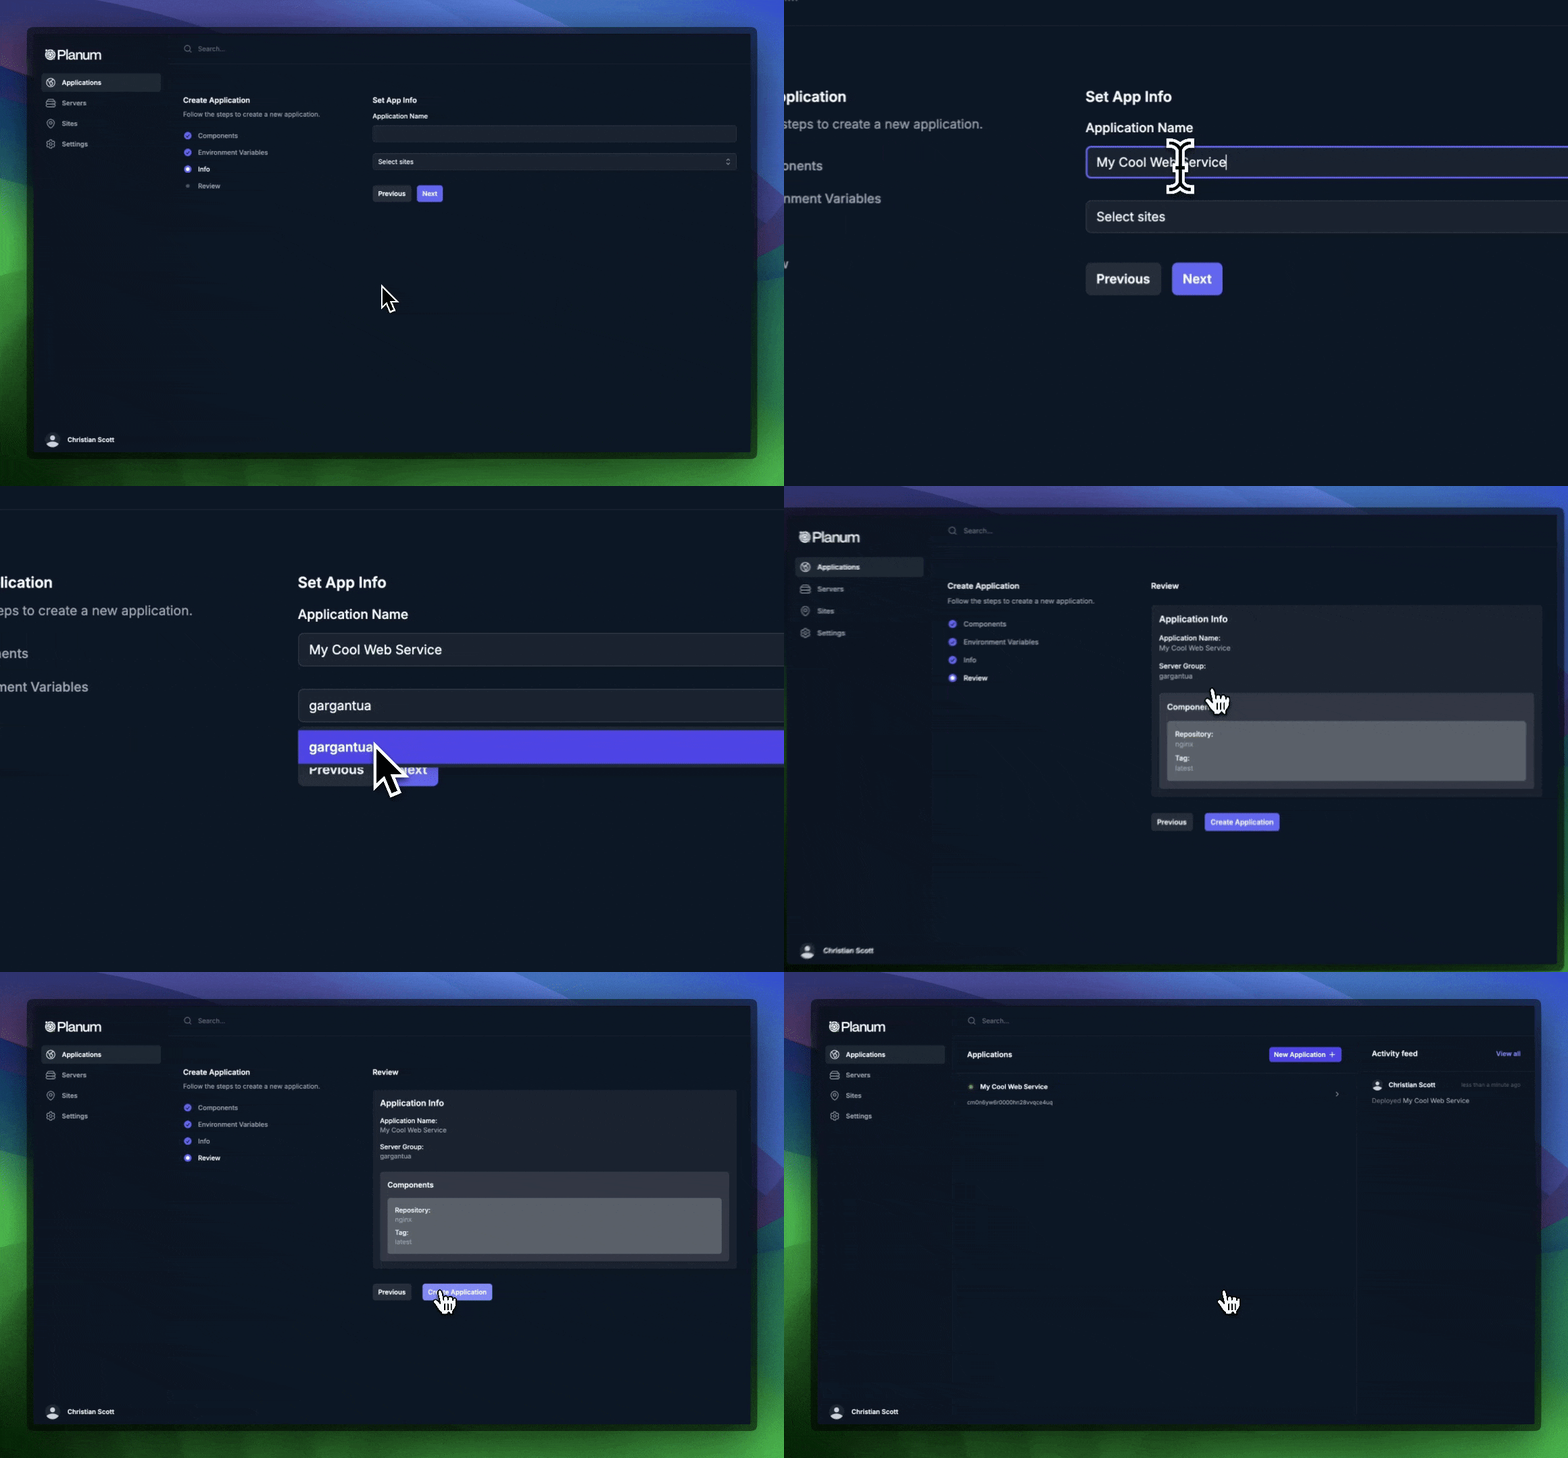
- Configure application info
- Review and deploy
Create Components
Components are the building blocks of your application. Each component represents a container image that will be deployed. When deploying from a container registry, the image is simply pulled using the settings you specify. When deploying from a git repository, you must include a Dockerfile for each container you would like built/deployed and an image will be built and deployed to your servers.
Set Environment Variables
Define environment variables for your application and individual components.
Configure Application Info, Review, and Deploy
Provide general information about your application and review your settings.
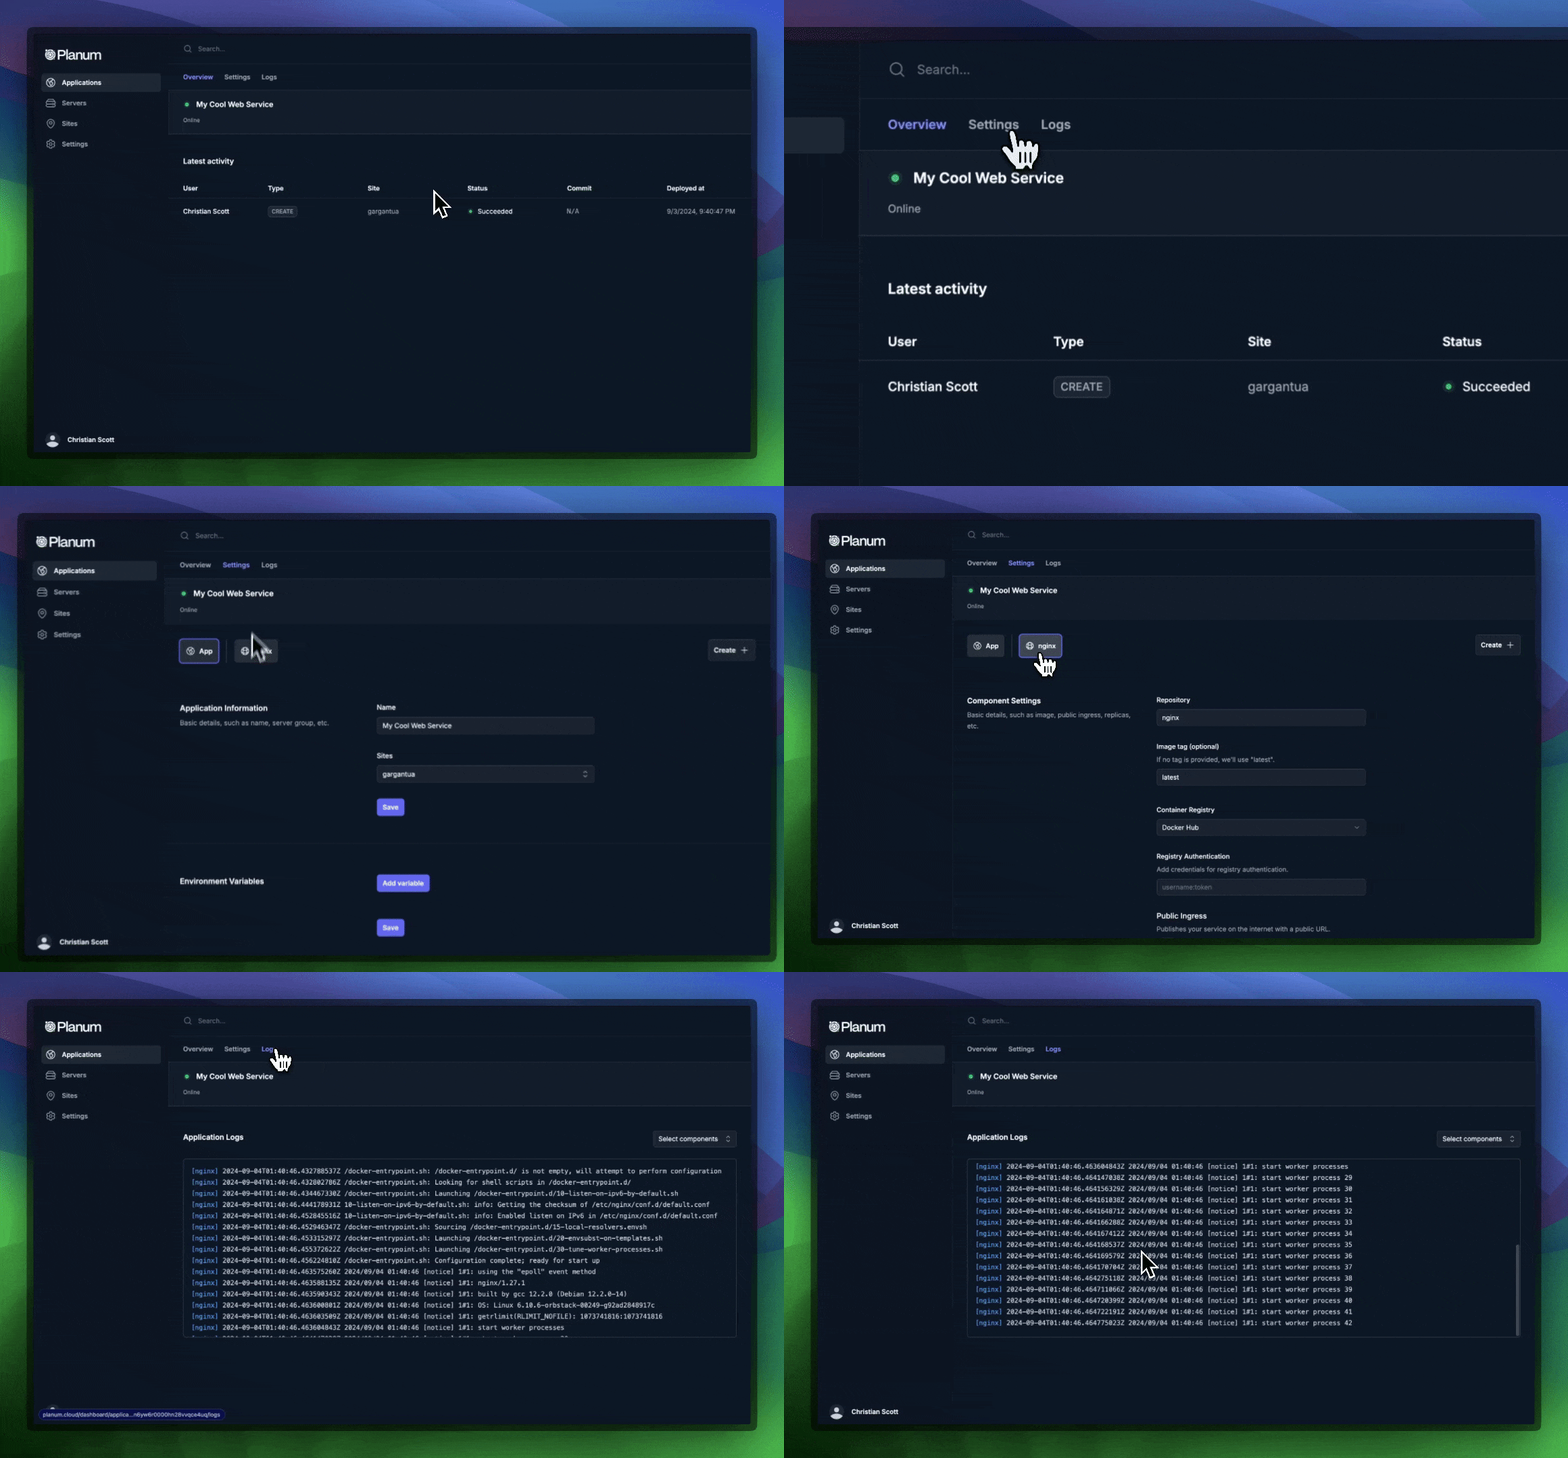
Post-Deployment
Once your application is deployed, you can monitor the deployment status, view logs, and manage your application through the Planum dashboard. If you enabled public ingress, you will find the link to your component in the component settings. For git components, you may now simply commit and push changes to your branch selected in the application configuration and your application will be continuously redeployed.